Tools
(to be updated soon)
I cannot even begin to express the importance of tools. Whether it’s defending or attacking, using tools can make the difference in losing a few soldiers and losing hundreds (or even thousands) of soldiers! In this week’s lesson we will break down every aspect of tool use and teach you the importance of why you should ALWAYS use them.
We will cover:
- Tool basics (what does what, why you should use them)
- Defense tools and how to set them up in your castle
- Attack tools and how to determine what to send
We will cover:
- Tool basics (what does what, why you should use them)
- Defense tools and how to set them up in your castle
- Attack tools and how to determine what to send
Tool Basics
Tools are used to add bonuses (attack or defense) to you soldiers allowing them to be better equipped for battle. Just like soldiers, tools can be produced at all of your castles and it is recommended that you produce tools just as often as you recruit soldiers! If you are a ruby buyer, you can instantly purchase even stronger tools from the menu and occasionally from the armorer. Tools as one of the most important parts of Empire, yet, so few realize this. Those who do, take advantage of them and reap the benefits tremendously!
Defense Tools
Defense tools give your soldiers bonuses when defending attacks. There are tools that boost wall defense, gate defense, ranged defenders defense and moat protection bonuses. When used together, these tools can make your castle almost impregnable!
Using defense tools:
- Only 1 tool per slot per wave is used when being attacked. Whether you have 1 or 100 of the same tool, it will make no difference.
- Since a maximum of 4 waves may be sent, it is a good idea to have at least 4 tools in each slot at all times, and an even better idea to keep 12+ in case of multiple attacks on your castle.
- To put this simply, you should have at least 12 tools in every slot of each occupied section of your castles AT ALL TIMES. Even if they are the basic tools, they are still better than nothing.
- Keep in mind that sections of your wall that do not have soldiers do not need tools. So if you are using the 0-0-100 setup, you will only need tools in the 100% section.
- Again, you should be producing tools around the clock! I try to have 100 of each tool at all times in all my castles!
Attack Tools
Attack tools are used for one thing, and one thing only, the cancellation of your opponents defense bonuses. You can see their defense bonuses from your espionage reports and from this, determine the exact number and type of tools to send on your attacks!
How do I know which tools to use?
- Use scaling latters, siege towers, and belfries to cancel out wall defense bonuses.
- Use mantlets, cast iron mantlets, and shield walls to cancel out ranged defender bonuses.
- Use battering rams, iron rams, and heavy rams to cancel out gate defense bonuses.
- Use wood bundles, assault bridges, and boulders to cancel out moat defense bonuses.
- Banners and war banners increase the glory earned from battle.
- Loot sacks and loot carts increase the amount of looted resources gained during attacks.
How to Break down an Espionage for tool use:
|
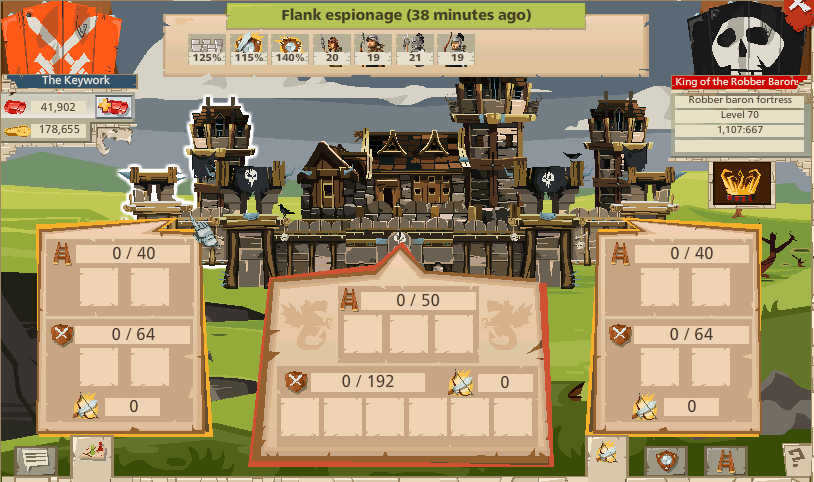
Here is our initial espionage. It tells us the basic troop setup and what tools they are using. This is not very helpful when it comes to determining which tools to use on our end though.
|

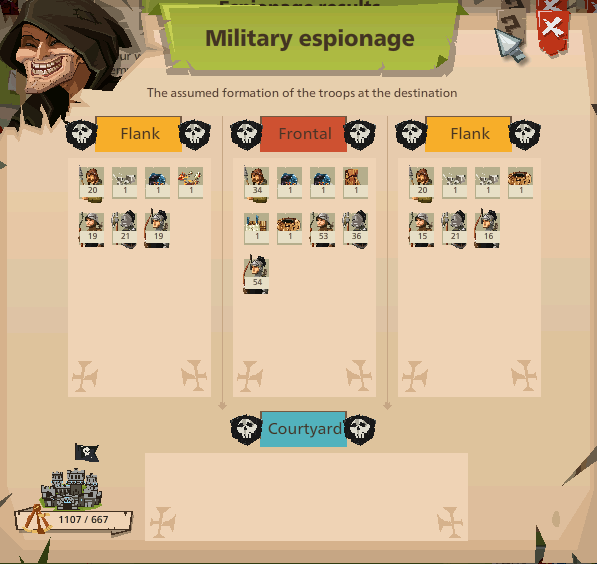
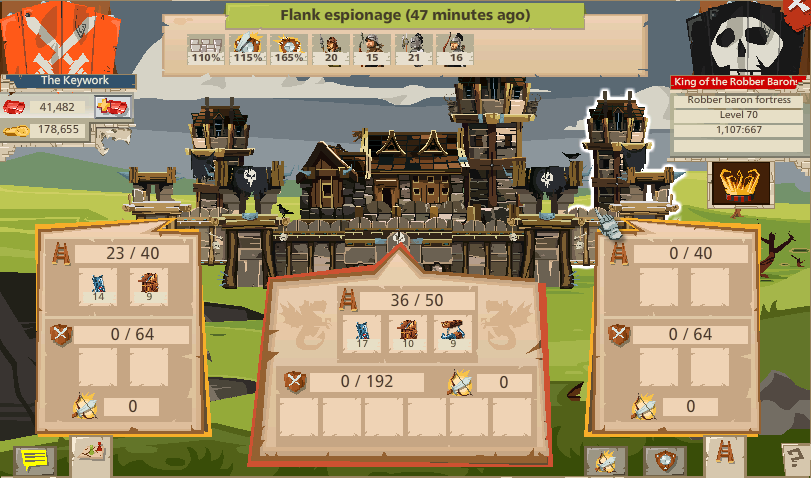
Once you click to attack, you will have all the info you will need to able to properly set up tools for your attack. I will guide you step-by-step through this process using this espionage on the King of the Robber Barons. You should use this technique on all attacks!

First, lets look at what each of these icons represent.

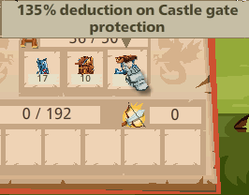
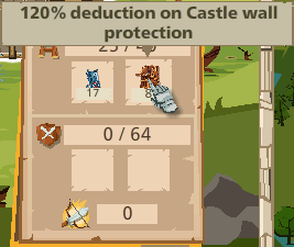
This tells us that the defender has a gate protection of 130%. To counter this, you will need to use battering rams, iron rams, or heavies rams.
|
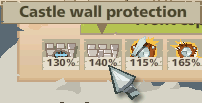
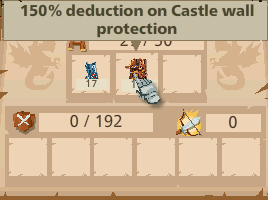
This tells us that the defender has a wall protection of 140%. To counter this, you will need to use scaling ladders, siege towers, or belfries.
|
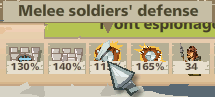
This tells us that the defender's melee soldiers have a defense bonus of 115%. There are no readily available tools for this, though there is one rare tool that is sometimes available from the Mongolian event.
|
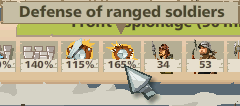
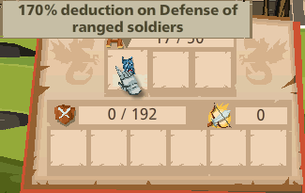
This tells us that the defender's ranged soldiers have a defense bonus of 165%. You will need to use mantlets, cast iron mantlets, or shield walls to counter this.
|
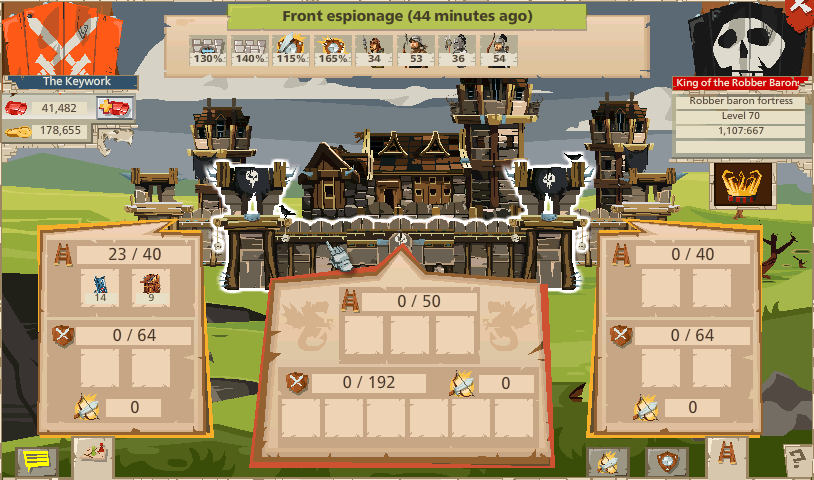
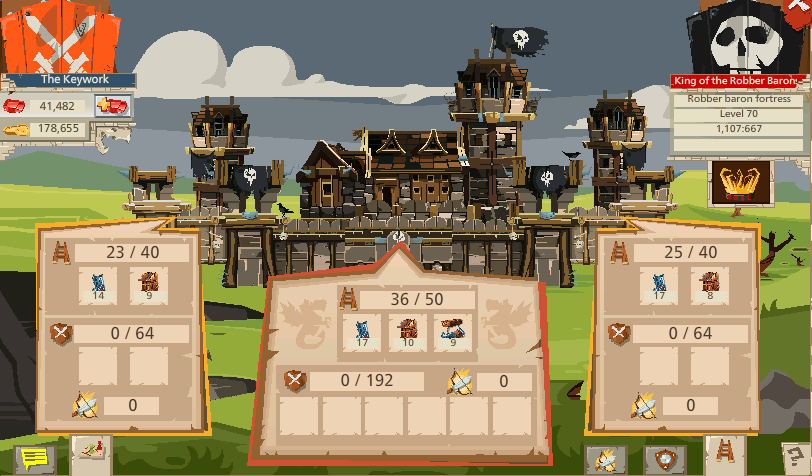
Now lets start setting up the tools... We will begin with the left flank (the order does not matter). Below you can see the defenders set up on the left flank of his wall. I will show you which tools to use and how to tell if you are using enough...

It does not matter which order you place your tools in. Below, the advice is color coated to correspond with the icon above so you know which one to look at. Also notice that the attack setup has a built in feature that tells you the percentages for your tools, which helps tremendously.
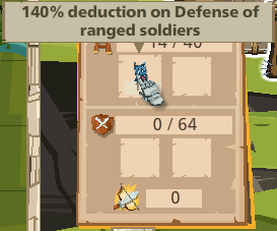
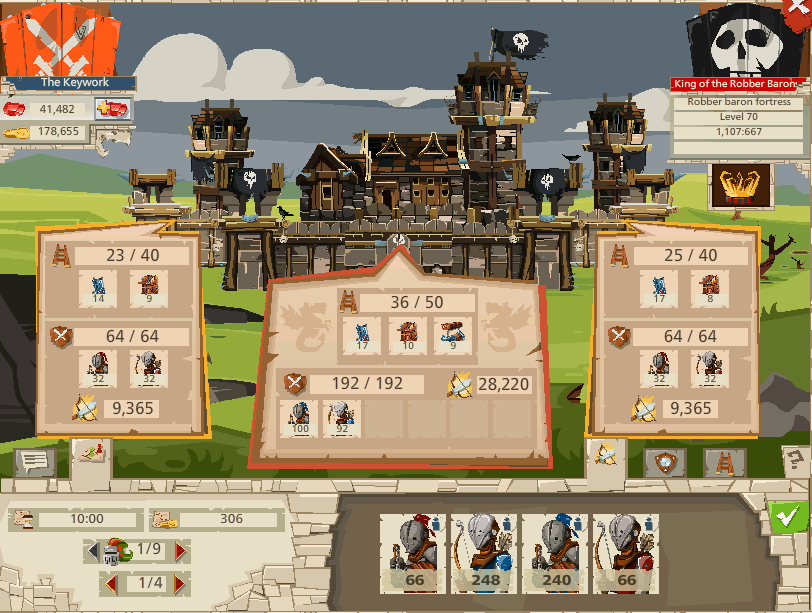
From the espionage, we see that we need to cancel out the 140% bonus for the ranged defenders. For this I placed 14 iron mantlets, giving me 140% to bring the defenders bonus down to 0%.
|
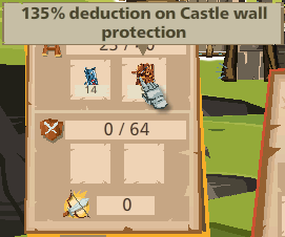
We also can see that the defender has a wall bonus of 125% percent. Here, I use 9 siege towers, which give me 135% to counter the wall bonus.
|
*** Special notes: If for some reason you run out of room on your first wave for tools, simply calculate the percentage that you are short and add the remaining tools to the following waves. Also you will notice that my percentages may not match the defenders bonus exactly. This is because each tool adds X percentage to the total. As long as your percentage is higher than theirs, you are good to go.
Now lets do the middle section of the wall...

Here, we see that we need to cancel out the 165% bonus for the ranged defenders. For this I placed 17 iron mantlets, giving me 170% to counter the defenders bonus.
|
Next, we can see that the defender has a wall bonus of 140% percent. Here, I use 10 siege towers, which give me 150% to counter the wall bonus.
|
Finally, I see that the defender has a gate bonus of 130%. To counter this, I used 13 iron rams, giving me 135% to counter the gate bonus.
|
And now for the right flank...


Here, we see that the defender has a 165% bonus for the ranged defenders. For this I placed 17 iron mantlets, giving me 170% to counter the defenders bonus.
|
Next, we can see that the defender has a wall bonus of 110% percent. Here, I use 8 siege towers, which give me 120% to counter the wall bonus.
|
Here is how my complete tool setup looks after these steps.
Additional notes...
- Remember, in the event that you run out of room for tools on one flank, you can always put the remainder in the following flanks.
- Notice that this espionage does not have a moat involved. For the moat, there will be an icon indicating its bonuses as well and you would use this same procedure for the setup as well.
- Typically, if there is a moat, I put the tools for it in the second wave.
- Make sure that you do not overuse tools, this will lead to lack of room that you could have used for other important tools in the beginning waves. The more bonuses you can cancel on in the first wave, the better.
- Once you have all of your major attack tools in place, you can use the remaining slots in all waves to put tools for loot and glory bonuses.
- Always remembers that weak tools are better than no tools!
- Also, keep in mind that your commanders' equipment can add bonuses to your attack as well. A well equipped commander can give you and even bigger advantage on the battlefield!
Here is my full attack setup... I only used one wave of soldiers to keep the report simple and let you see the tools at work!
Results!
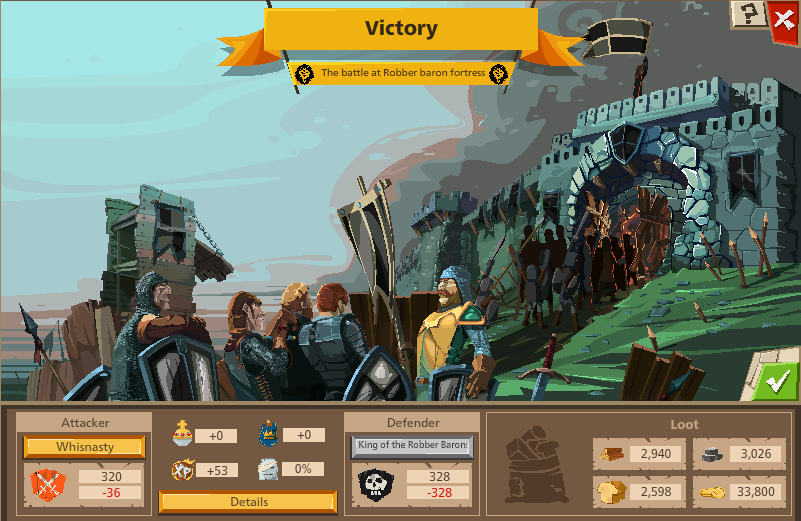
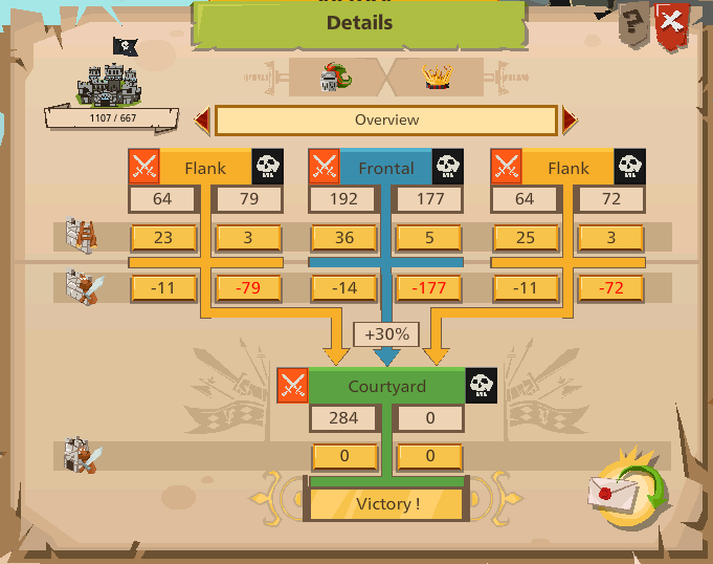
The proof is in the pudding!! As you can see, my troop loss was cut to only roughly 10% of my total troops sent, and that was with a minimal 1 wave effort. Other techniques (such as martyr waves) could have cut my losses even more and will be discussed later in other lessons. Please do not take tools lightly. They can be the difference in a small loss of troops and a great loss of troops!!!
